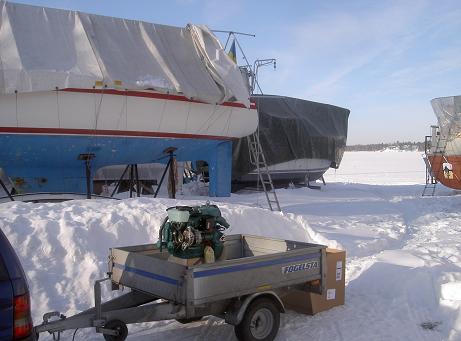
The right is a pic taken at the Stockholm Boat Fair taken place at the moment.
Hi. So I have now decided to go all the way regarding the engine
replacement.
Scroll the hole page, I will insert updates as it comes.
Due to the differance in length of the mounts I have ordered two 550 X 50
X 8 mm stainless steel plates that will become the intephase between the old
engine attachement points and the new engine mounts. 2006-09-02 Did not
need it since there was a stainless steel beam plasted into the engine bed.
Did only drill new holes and threaded them to M8 (8 millimeter fine thread).
(2006-04-09 It seems as if they are not necessary since my boat previously had
an engine with the S-drive installed, having different mounting distances, see
pictures. Maybe my boat already have these plates plasted into the engine beams.)
I had no problem selling the old steamer, I was absolutely overthrowed with people wanna buy it. So Kari from Finland will come over here the 18-19 of March to help me removing it and then bring it home to install it in his project.
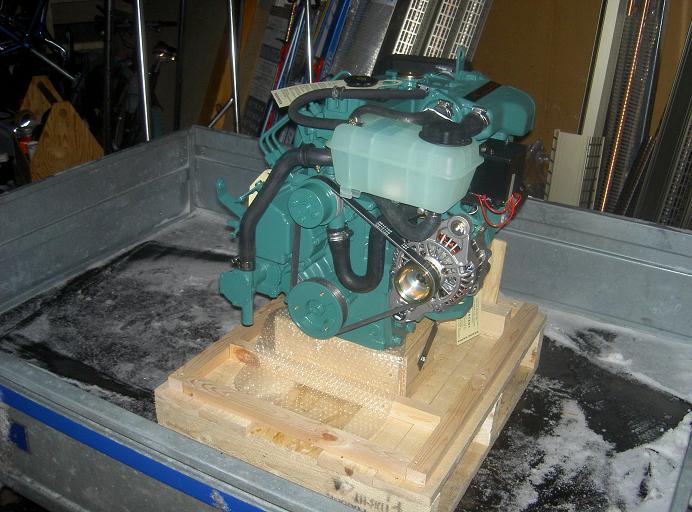
2006-03-05
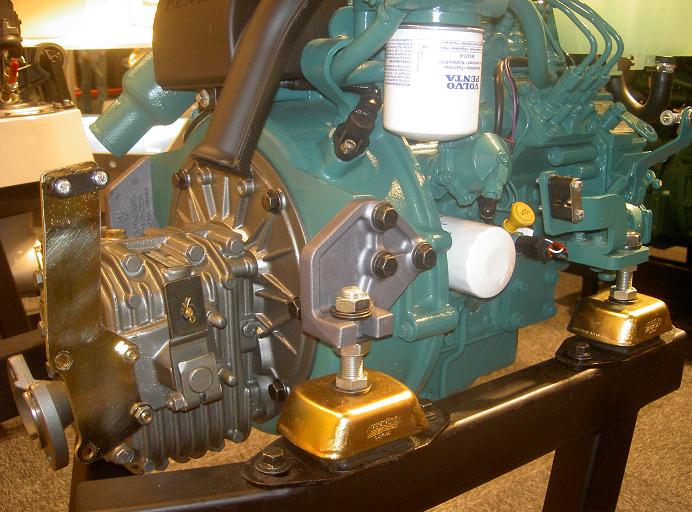
Yesturday I picked up the new engine I bought from Brohälls
Marin situated at Bullandö
Marina at Värmdö Lat N 59° 17' 58? Lon E 18° 38' 53?.
I couldnt refuse to take a couple of pics of it.
The right is a pic taken at the Stockholm
Boat Fair taken place at the moment.
2006-03-19
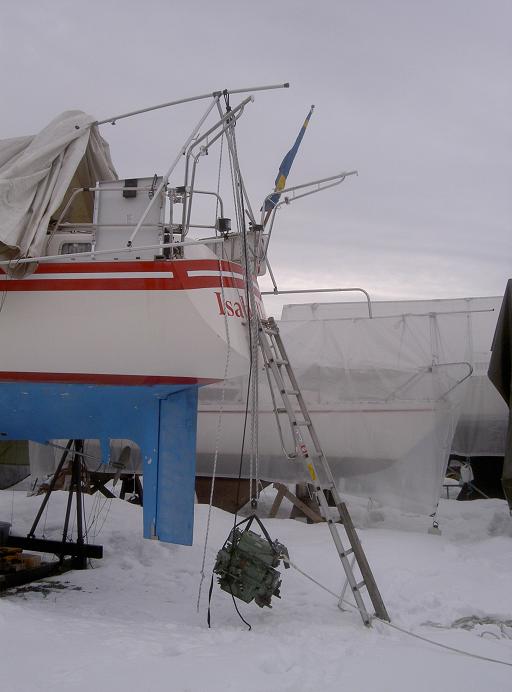
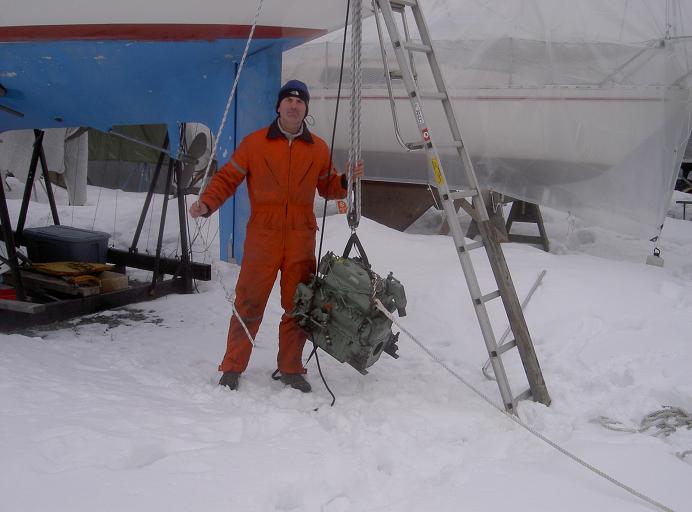
Yesturday Kari and I removed the old steamer out of Isabelle. It took us approx
4 hours from first hose removed until pushed into Karis car. We worked really
as a team, Kari working from the gearbox and me from the forward section, undoing
the generator, hoses and mounts. The tricky part was moving it along the upper
tube, making the top of the boathouse. The aluminium tubes performed well but
with some doubts. Lifting the new engine on place was easier, maybe also due
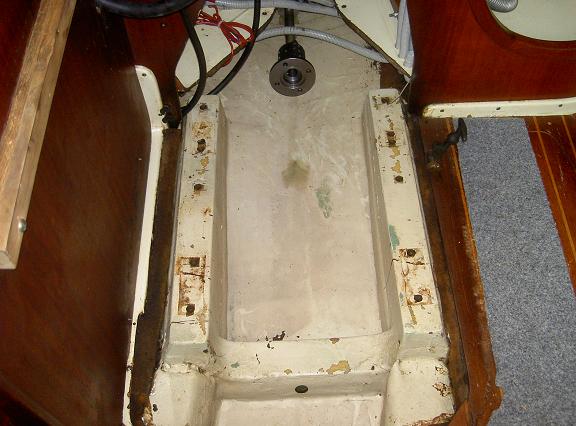
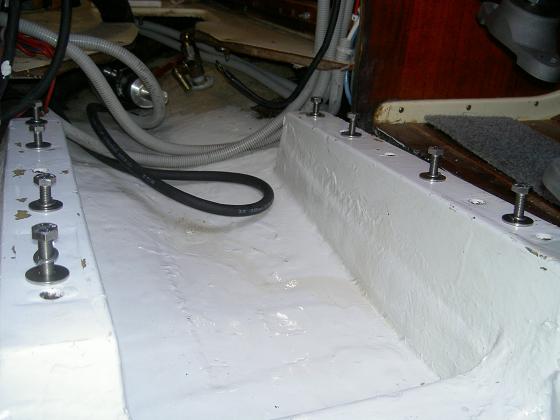
to the smaller size and some lesser weight. Well the area below the old engine
has never been really cleaned thouroully and the pics below might give some
indication proving just that hmm not a nice one. The fluid is spillage of anti-freeze
and diesel after removing the different hoses.
Anyhow the new engine is at least inside now and there is time for "the
big cleanup". I will paint the bilge with some off-white epoxy paint as
soon as the temperature as rised above 10 deg C (50 deg F) so the paint will
cure.
If Mohammed cant come to the mountain!!
On the move..
Almost as happy as a moose hunter.
Hanging inside
See what I mean, not so nice, huughee!!!
Soon to be a nicer area.

2006-04-09
So finally I seems to find my time to start overhauling Isabelle, yesturday I cleaned out the engine bed. I will on friday start to sandpaper the area and then paint it with epoxypaint.
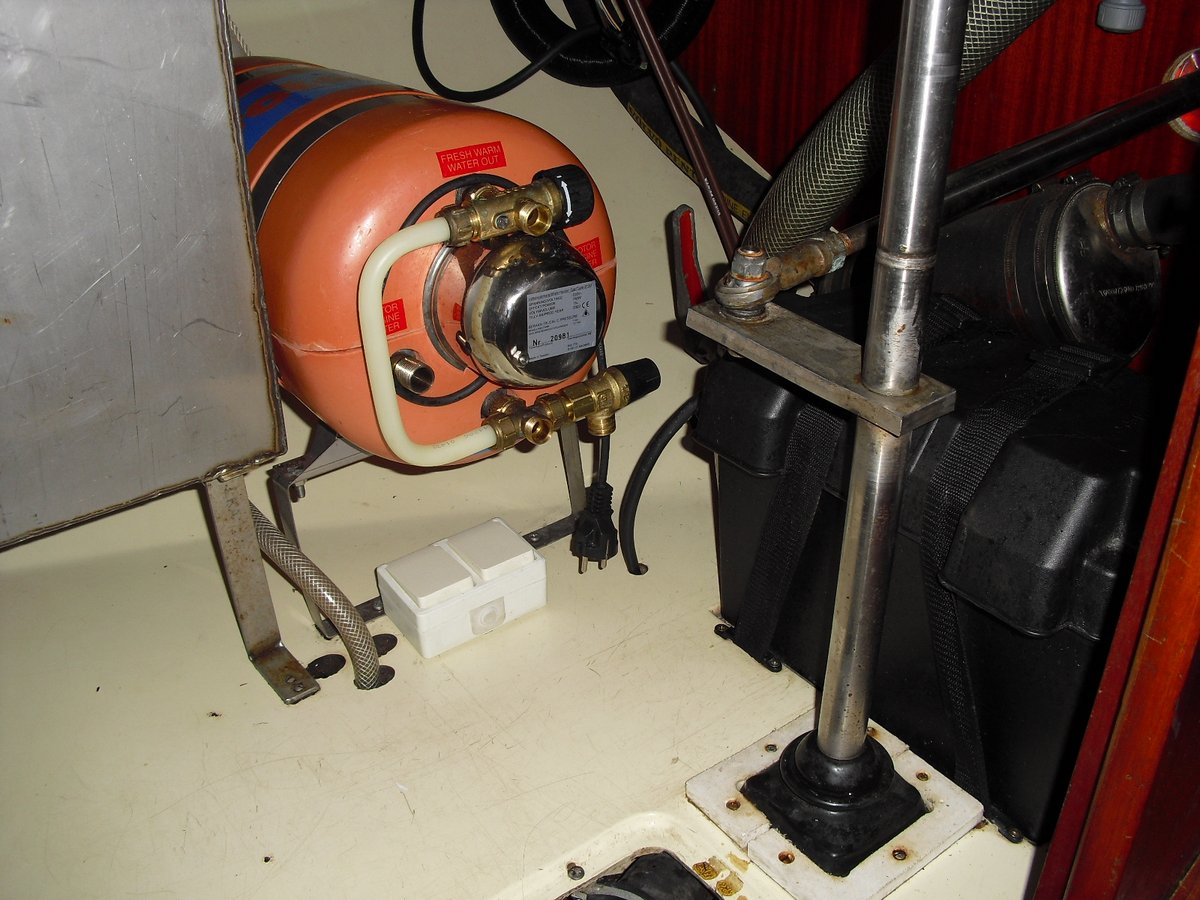
I also reinstalled the compressor frige, it has been taken to service and a filter replacement. The filter have to be replaced in a way that the tubings are cut just fore and aft of the filter. The new filter is then soldered back.
I also had one of the new Lewmar hatches just to investigare how I should go thru when installing all three on thursday.
Some pics, take care.
2006-04-16
At the moment I have just finished painted the engine compartment with an Off-White
polyuretan color.
Also just done the three Lewmar hatches, boy I am busy. But I know whats to
come, a fit tool in a beatiful enviroment.
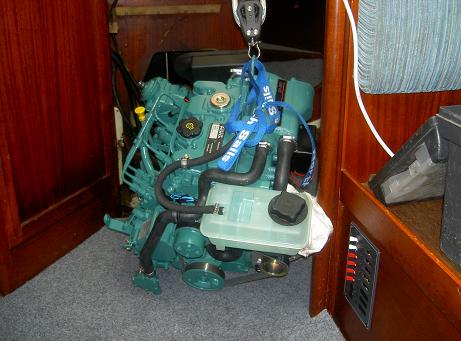
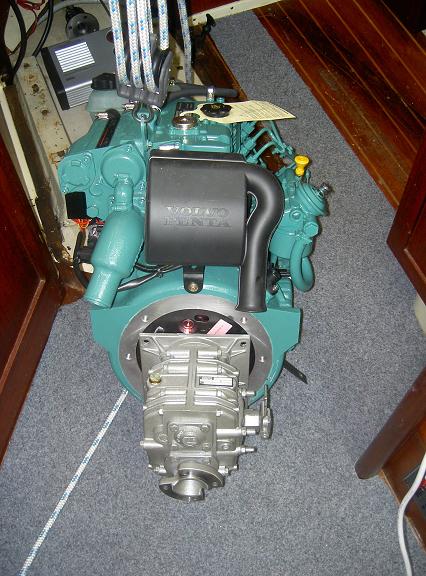
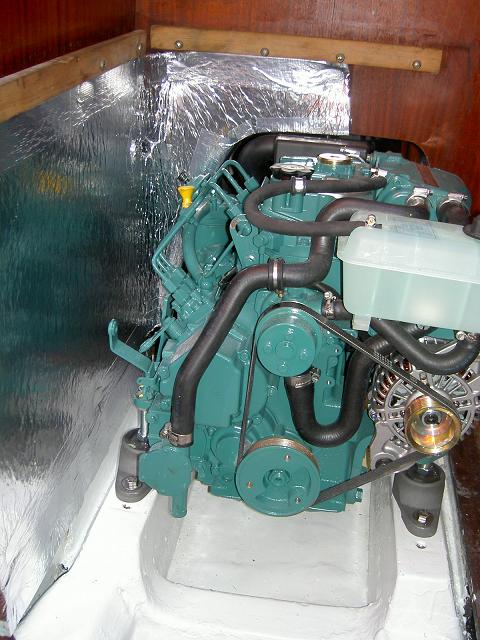
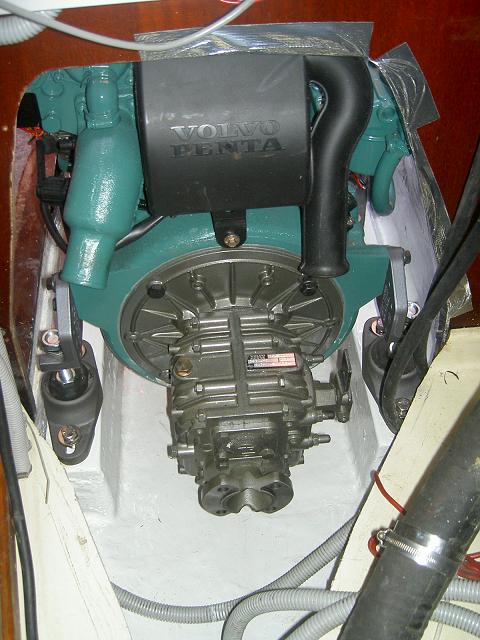
Here are som pics of the new steamer. Unfortunattly the company
selling me the engine gave me the wrong gearbox, they gave me a straight one
when I needed an angle gearbox. And now I just discovered that they havent sent
me the engine-shield that acts as an interphase between engine and the gearbox,
o'boy. Inserting a pic so you see what I mean.
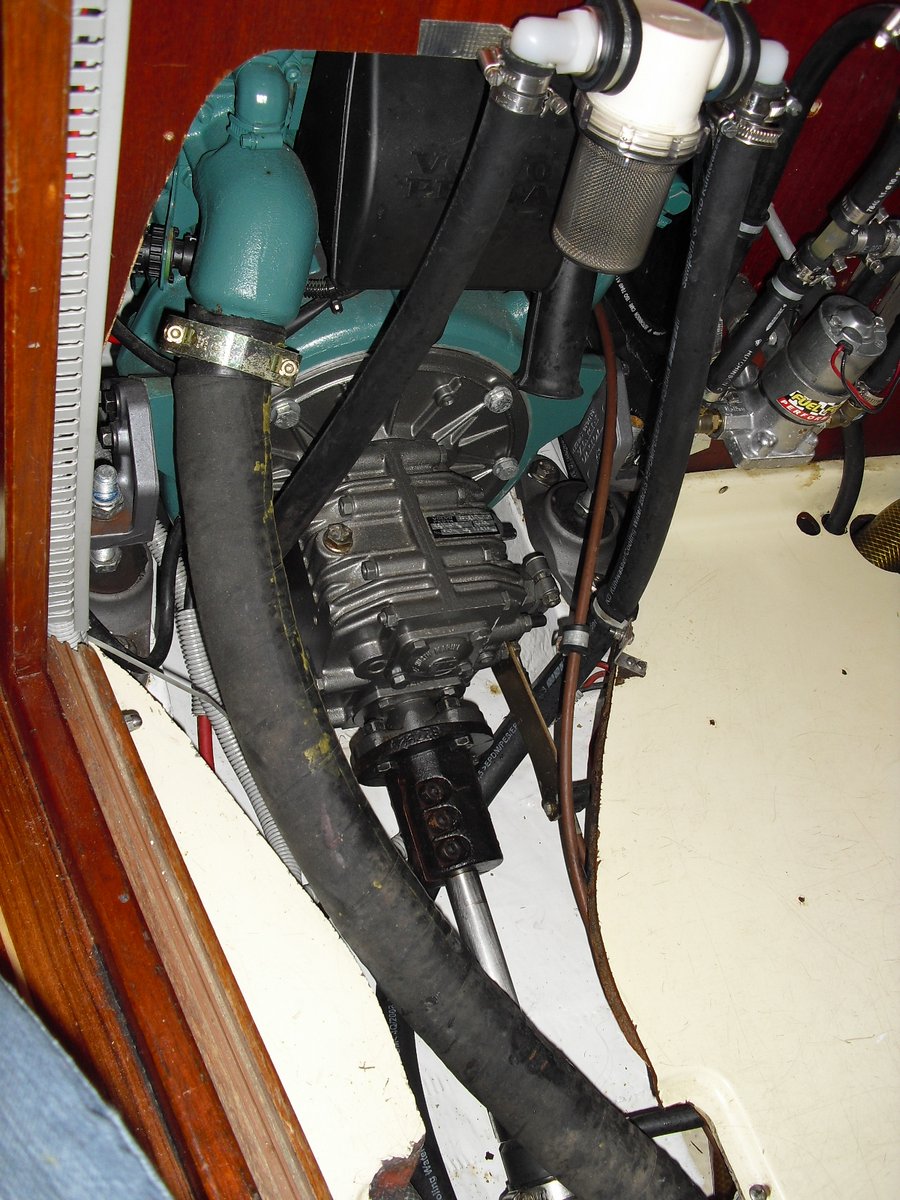
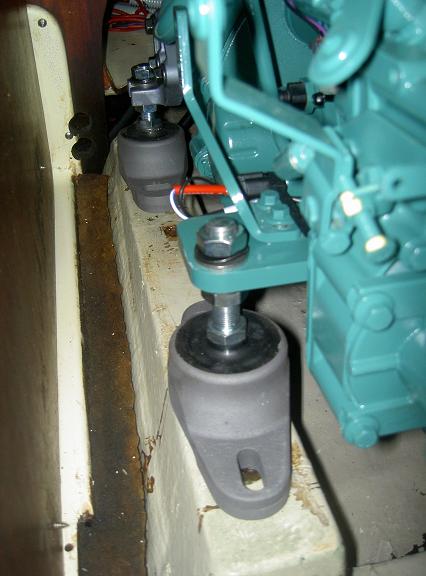
One thing that aslo worries me I is the small clearance between the alternator
and one of the engine mounts, this doesnt leave me with too much room for adjusting
the engine to the propeller shaft.
By the way I didnt take any pictuers after I have painted the engine compartment.
Take care.
2006-05-10
I am slowing but surely moving forward, an engine replacement has so many different
sub-processes.
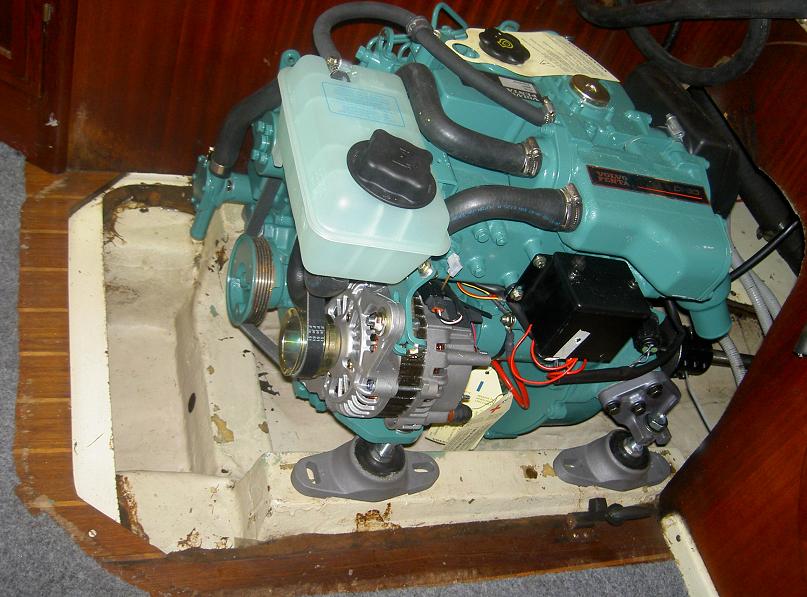
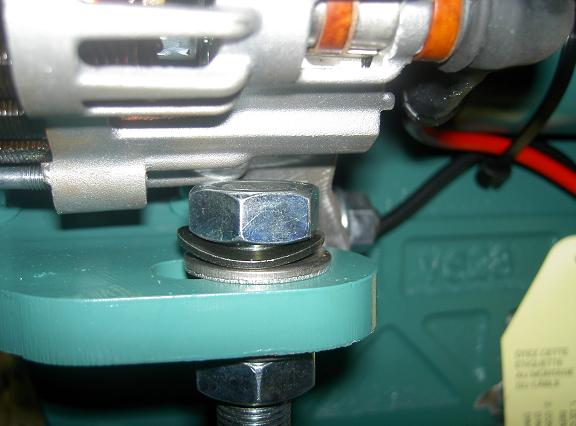
At the moment I am very glad over the fact that I had a full steel beam plasted
into the two keel frames. This made it possible to just drill and thread new
bolt holes without having to open the frame and use loose nuts from below as
I have seen other was forced to. Inserting some new pics. One of them showing
how I am lifting the engine when mowing it around.
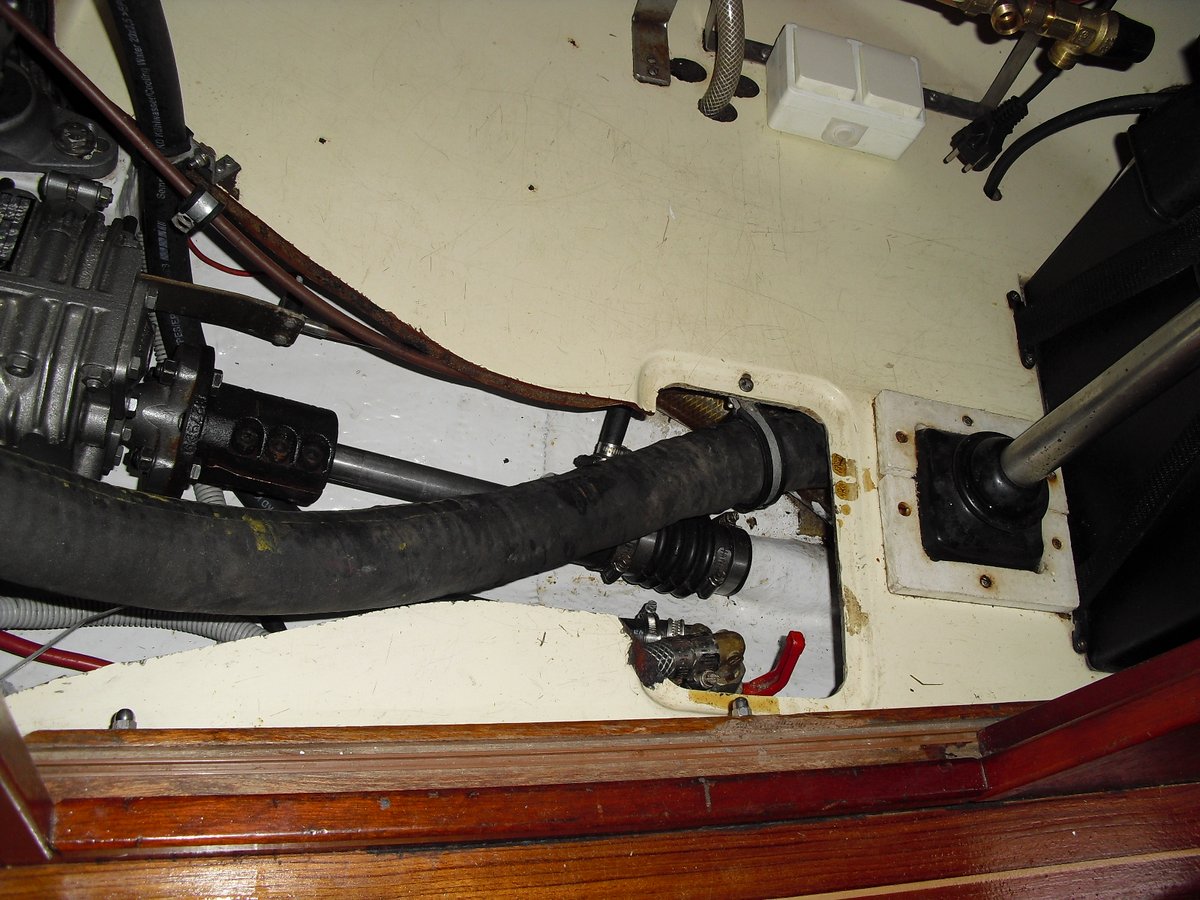
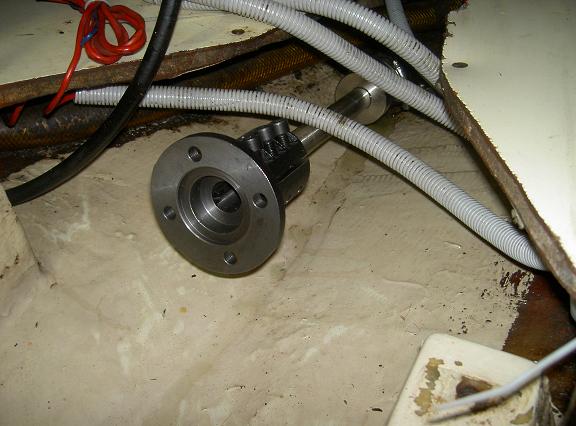
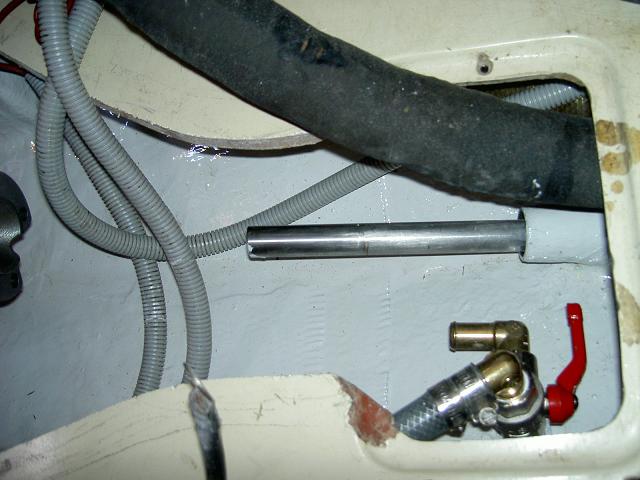
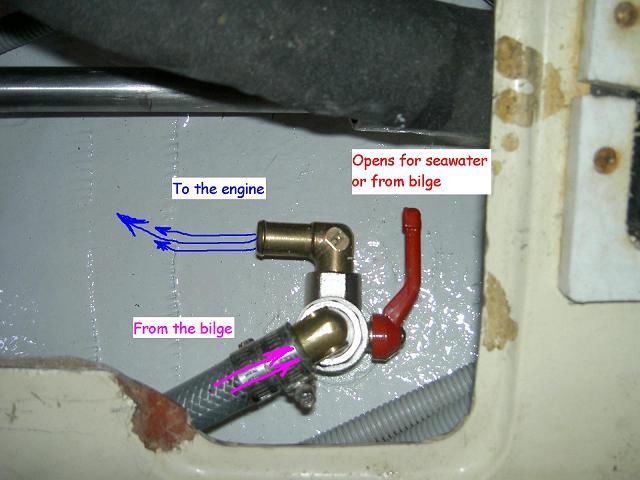
Also inserting a pic of my new and larger ( 3/4" ) thru hull fitting. This
was necessary due to the engine replacement.

2006-05-13 22:53
Just a quick one before turning in.
2006-05-20
Greetings all.
I have now started the new engine and it runned very smoothly, what may be a
little concerning is that the propeller shaft is knocking on the sterntube when
running at idle. This is not something new, it did it also before but it is
so obvious when running the engine on dry land. I connected the speed and gear
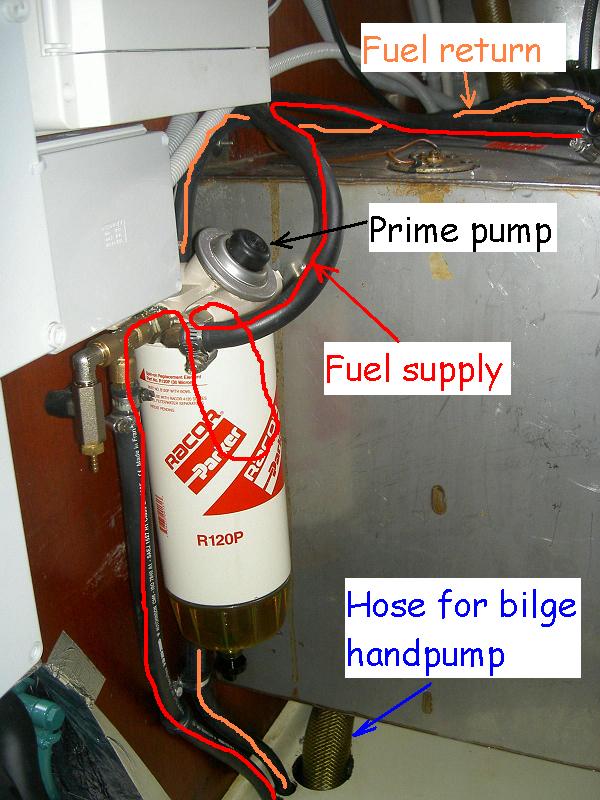
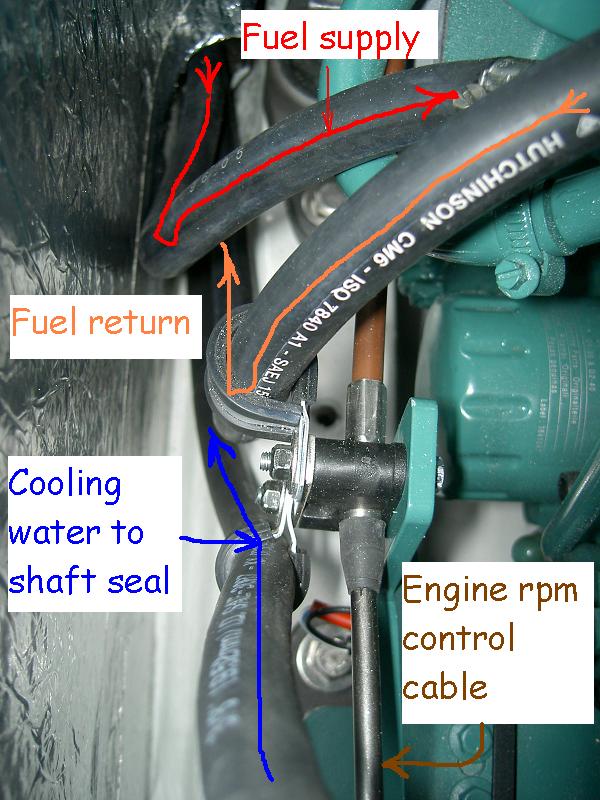
control cables yesturday as also the positive and negative power leads. Then
I just bleeded the fuel system and she started perfect. Today I will run her
a little more extensivly. Inserting some new pics of the installation.
This project will be closed the next few days. Lessons learned: ALWAYS check the items delivered by your local boat-gear pusher before accepting the boxes and hang on like a tiger if something is wrong.
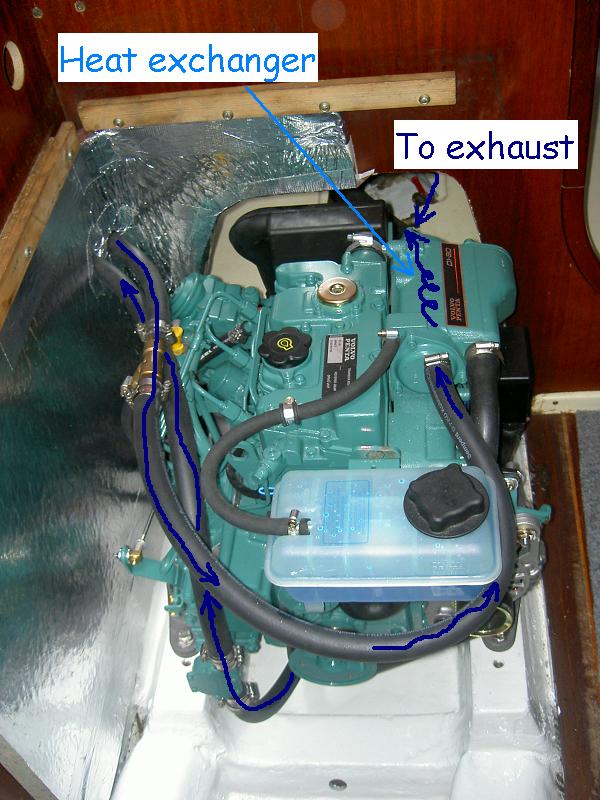
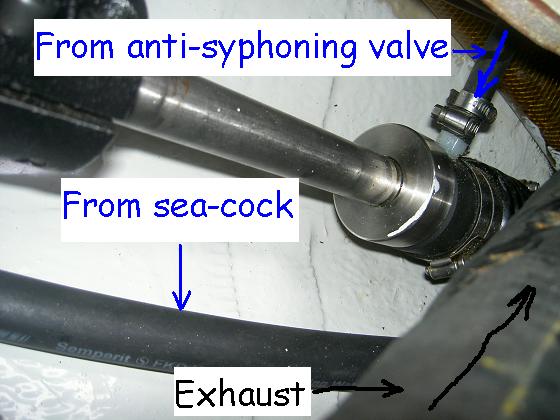
Här kommer bilderna på dragningen av avgasslangen.